
It has been a while since the Gutenberg Block Editor landed, and it brought a pile of new blocks with it. One of them, the Cover block, keeps getting mixed up with the Featured Image box. I get why. Both involve putting a picture at the top of a post, and both live in the same editor window.
They are not the same thing, and using one when you meant the other is why your posts look fine on your site but show up as a blank grey box when someone shares them. So here is the short version, then the clicking.
A cover image lives inside your post. A featured image sits behind your post, in the theme, and gets handed to Google and social media.
1. Cover Image
What’s a Cover Image?
It is a bold image block with an optional visible title. This block allows you to add a title over a background image.
A cover image is part of your content, part of your blog post.
How to add a cover image
Before this block existed, bloggers used headings and subheadings to break up sections (we still do, and we should). The Cover block just gives you a picture to do that job.
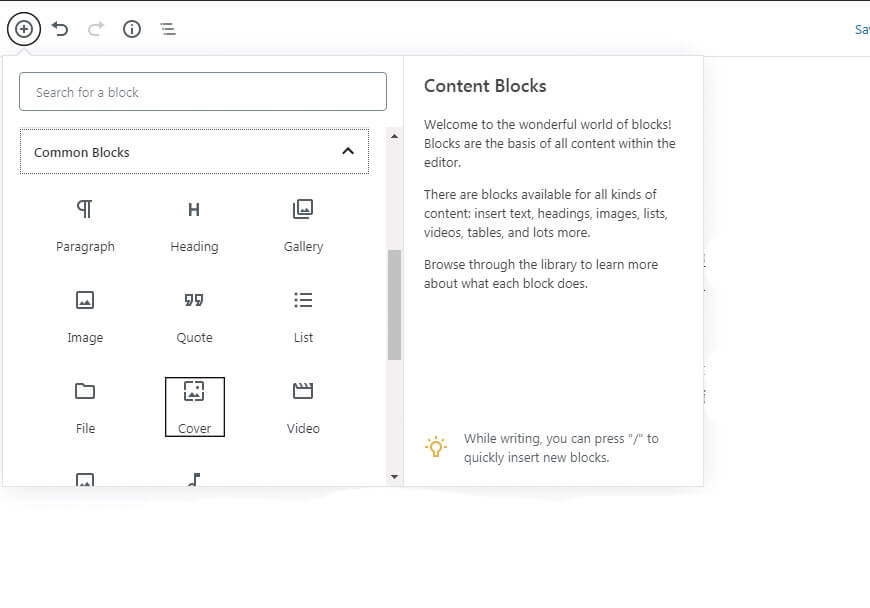
Adding it is the same as adding anything else. The “+” button in the top-left corner opens every available block. Under “Common blocks” you will find “Cover”, or you can type its name in the search box.
Either you upload your desired image, or it’s already uploaded in Media Library. Alternatively, you can drag-n-drop, it also works as an option.
This is a cover image
Once you have selected the image, you will be able to customize it. On the right-side panel, a toolbar with the customization options for the cover block will appear.
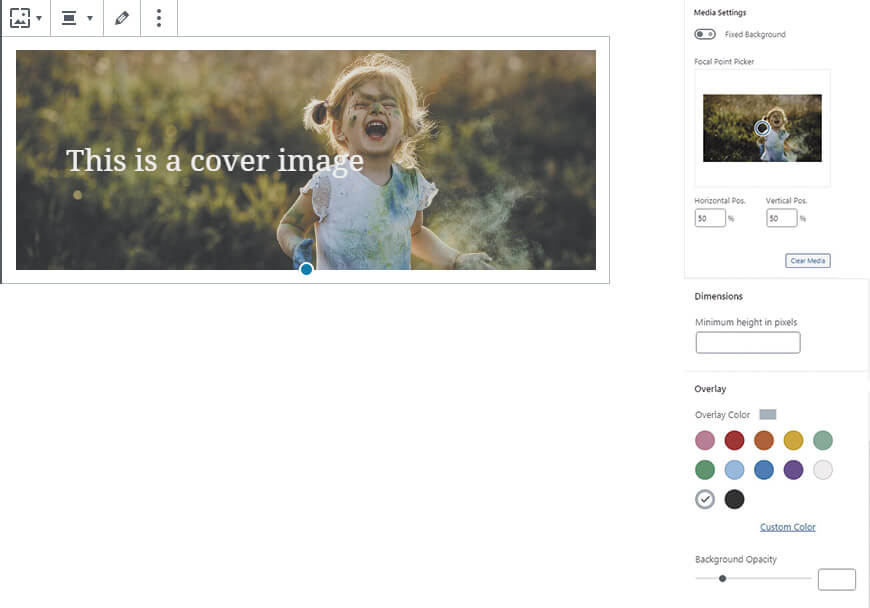
Now, before we go any further, I want to go briefly through options for the cover block.
- Fixed background: if you enable it, you will have a parallax effect when readers scroll down;
- Color overlay: this option is to add to your image an overlay color with 50% transparency, but hey, you can change both the color and opacity.
Below these options, you also can add CSS code and more styles by going to the Advanced Options. And voila, you just added a cover image. Incredible, isn’t it? 🙂
2. Featured Image
What’s a Featured Image?
Known also as post thumbnails, is a WordPress theme feature that allows developers to add support for using a representative image for posts or pages.
How do you add a Featured Image?
You can add anytime a featured image straight from you WordPress Editor, while typing your content.
All you need to do, is to click outside the part with text, and on the right side you will see a different menu from the one that you see while editing your post.
Scroll down, under “Tags”, you will see “Featured Image”. Click there, “Upload files”, select your files, and you’re done.
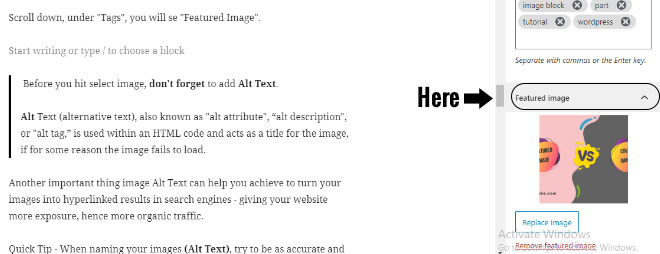
Before you hit “Select image”, don’t forget to add Alt Text.
Alt Text (alternative text), also known as “alt attribute”, “alt description”, or “alt tag,” is used within an HTML code and acts as a title for the image, if for some reason the image fails to load.
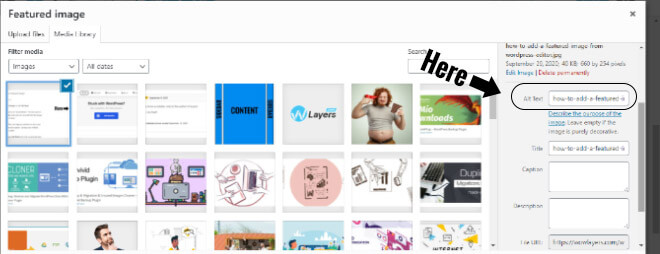
Another important thing image Alt Text can help you achieve to turn your images into hyperlinked results in search engines – giving your website more exposure, hence more organic traffic.
Quick Tip – When naming your images (Alt Text), try to be as accurate and descriptive as possible. If you plan to add underscore “_”, don’t. Instead, use hyphen “-” to separate words. Search engines will see your image title as a phrase, and not as a single word.
A featured image represents the article, and it been shown along with the blog title.
End of the “journey”
To clear that confusion up and hopefully you understand me here, the only difference between a cover image and a featured image is that the last feature makes a contribution in helping search engines to index your content based on that image.
For example, if you name an image “Salmon with Grilled Eggplant and Chickpea Croutons” when people search for a recipe with salmon and choose the image search, your image might pop up there between the results.
Instead, a cover image just separates the blocks in your blog post.





No Comments