

You got the flow to write, you got the audience. But is it enough? What’s a website without videos? Without images? Just a piece of white “paper”, if I may say that.
People love online interactions. Why not using this aspect in your favor? By adding videos & images, you attract more visitors.
Because we are talking about engagement (user interactions), in this article I will cover the following beginner topics:
- How to embed videos in WordPress?
- How to show images in rows and columns?
- How to make images into links (clickable images links)?
- How to add a contact form?
Videos

What’s an embed code?
It’s nothing more than a piece of HTML code, which when entered into your website page source, creates a video object.
How do you embed videos in WordPress? Embedding videos with 2 methods.
I’m going to show you 2 methods. One is an “old fashioned way”, the other is a “modern way”. “Old fashion way”? “Modern way”? What do you mean? Hold your horses, I’ll explain below:
Option 1 – Using WordPress auto-embed option
WordPress has a great feature called “auto-embed”, that allows you to get the embed code from any popular video services like YouTube, Vimeo, etc.
How? Just copy & paste the video URL directly into WordPress editor. Once you add your video URL, you can change its settings from the block toolbar. That’s why I called it the “modern way”.
Option 2 – Paste the code into WordPress Editor HTML block.
Before you can add an embed video with this method, first you have to go to the video you want to add and click on the Share button.
Once you do that, look for an option called Embed. Now, all you have to do is to copy the embed code to your clipboard. It should look something like this:
<iframe width="560" height="315"
src="https://www.youtube.com/embed/lclLJz5Rd5M" frameborder="0"
allow="accelerometer; autoplay; encrypted-media; gyroscope;
picture-in-picture" allowfullscreen></iframe>
Then click on the “+” symbol in any WordPress post or page, and select Custom HTML Block. If you can’t find it, search it. Paste the code, save, and you’re done.
What’s the advantage of this method?
You can change the width and height of the video.
Example: If you want the embed video to take the whole horizontal space of the post, instead of 560 pixels which is in this case, you just have to replace “560” with “100%” as seen on the example below:
<iframe width="100%" height="315"
src="https://www.youtube.com/embed/lclLJz5Rd5M" frameborder="0"
allow="accelerometer; autoplay; encrypted-media; gyroscope;
picture-in-picture" allowfullscreen></iframe>
You can also change the height parameter to any value you desire.
Why should I embed a video on my website?
Well, because statistics don’t lie. I believe in statistics and I like to use the numbers in my own favor. Check out the following infographic:

Images

How to show images in row and columns in WordPress?
Why do you need to do this? The answer is very simple. Let me give you an example: if you are adding multiple photos to a blog post, it will not look very professional and will require a lot of scrolling from your users.
Solution? Displaying photos in rows and columns using a grid gallery, which is provided by WordPress editor. This way images will appear in a compact layout and improve user experience on your website.
How do I display images in rows and columns in WordPress?
On the post edit screen, click the “+” symbol and select the “Gallery” block. Upload desired photos, or choose from the ones that are already uploaded, click on “Create Gallery” link from the left column and then click on “Create a new gallery” button.
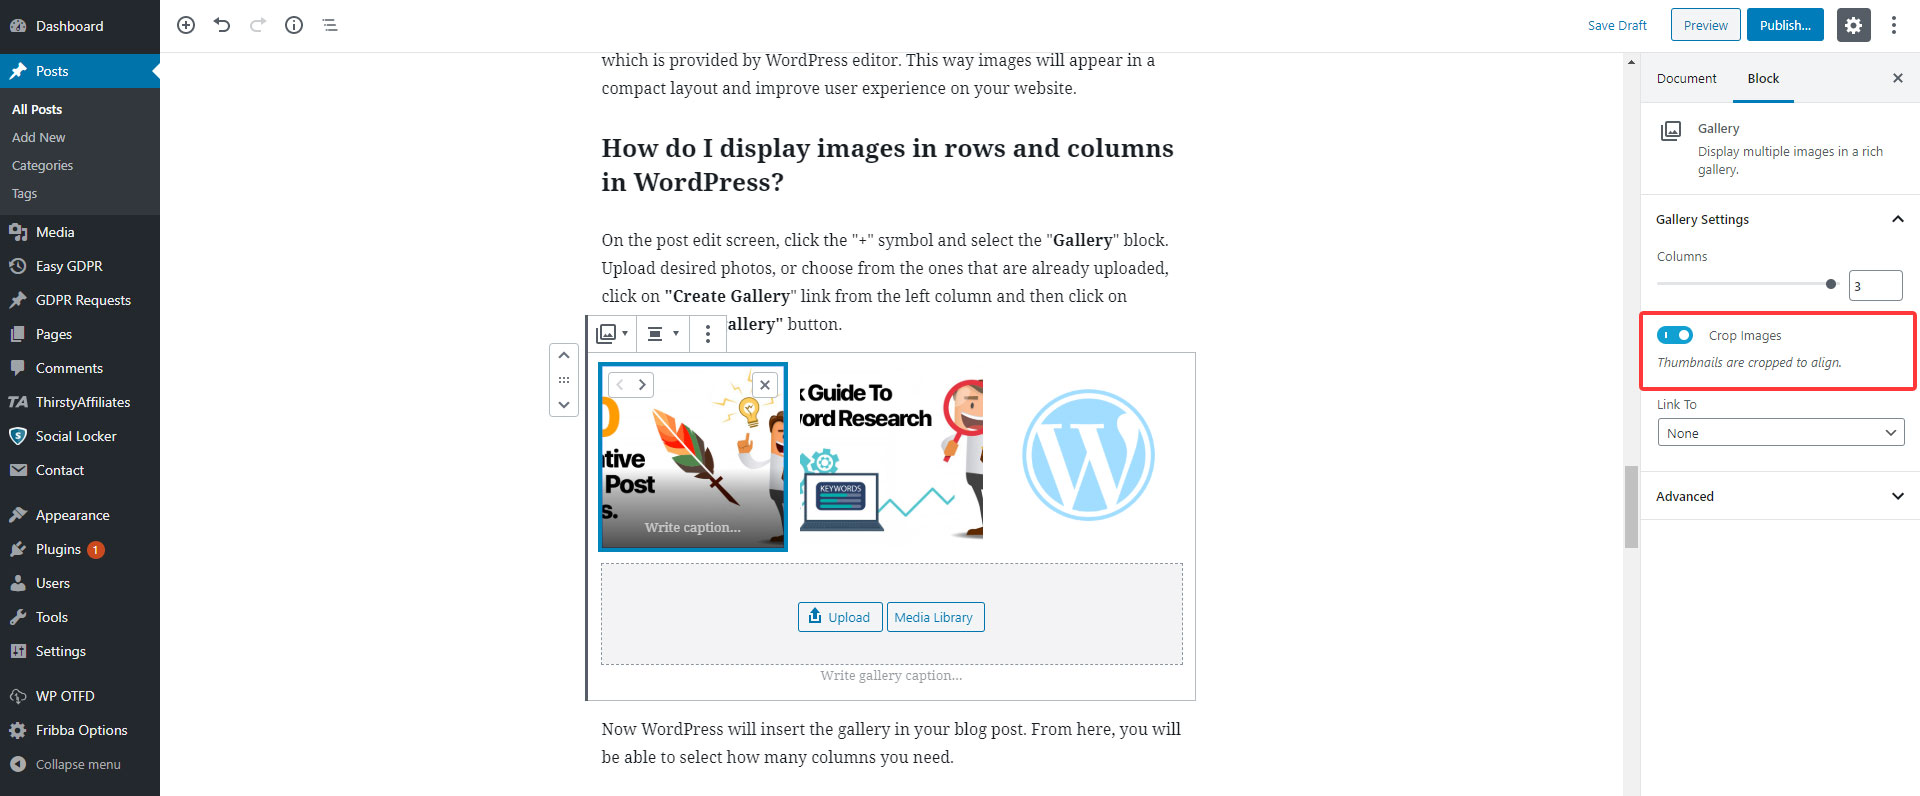
Now WordPress will insert the gallery in your blog post. From here, you will be able to select how many columns you need.
When you create a Gallery, you have 2 options. You can either select the “Crop images”, shown in the left menu, or you can crop the images by yourself. But remember to keep the same size for all images that you crop.
How to make images into links (clickable images links)
Quite easy! After inserting an image into the editor, click on it, and above you will see a chain icon ( or simply press CTRL+K if you are on Windows ). Click on it, a window will pop up, asking for the URL. Type or paste the URL you want, and hit “Apply“.
If you want the link to be opened in a new window, click on “Link Settings” (the dropdown icon) and make sure the “Open in new tab” option is checked.
Contact form

What’s a contact form?
Contact Form it’s a set of questions that once filled out by users it’s automatically sent to your email. This feature enables visitors to directly contact and engage with you, the owner of the website.
How to add a contact form in WordPress?
To add a contact form, you need a plugin. The one that we suggest is Contact Form 7. Why? Because, first of all, it’s free, and secondly, it provides some great features.
The first step to setting up Contact Form 7 is to install the plugin. To do that, in your WordPress dashboard, select Plugins > Add New from the menu.
Once here, on the right part of the screen, you will find a search box, type the name “Contact form 7” and click Install, then Activate.
After activation, on the left menu, you will see a “Contact” option, from where you can manage and edit contact forms.
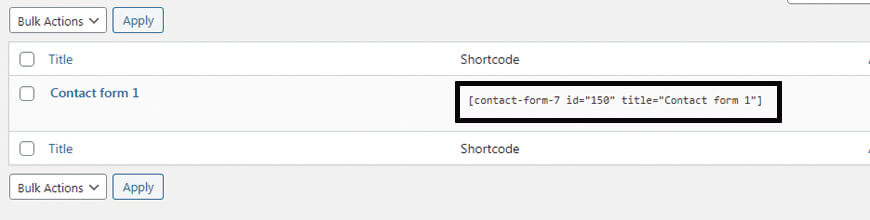
By default, there’s a contact form labeled Contact Form 1, which contains all the basic fields you need. This form is ready to use and can be inserted into any page and post of your website.
So far, so good?
What to do next?
You have the plugin up and running. Next, you will need to copy the shortcode and paste it into your post, page, or text widget content.
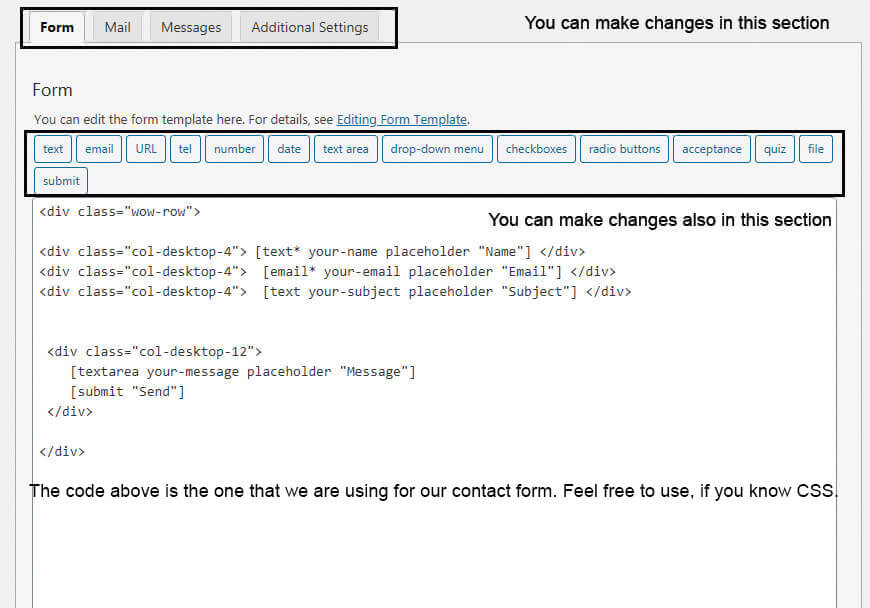
You can edit with your own information, or you can create a new contact, by pressing the Add New button, from the Contact menu.
Bring your website to life
Effectively used, images can help drive more visitors to your website, promote social sharing and ultimately help drive business goals. Visuals (videos) give us a better understanding of not just the message, but what’s behind the message.
Having all kinds of “tools” (embed videos, images, contact forms) will stimulate your audience to interact with your website.
Creating content consistently is one of the best ways to keep users around longer and get them to view multiple pages. Useful, engaging content will drive traffic to your website. Once that traffic is there, they’ll stick around, keep reading, and eventually become a subscriber or customer if you have a wide array of informative blog posts for them to read.
That being said, keep in mind:
“People will always choose an online video tutorial over reading the manual.”


No Comments